Populate the Platform from Scratch
Within a few steps administrators will setup a running configuration matching many use case / logical topic. This section provide a step by step methodology.
Note
This section is using CAS console for platform population but everything described here could be scripted using CAS backend API.
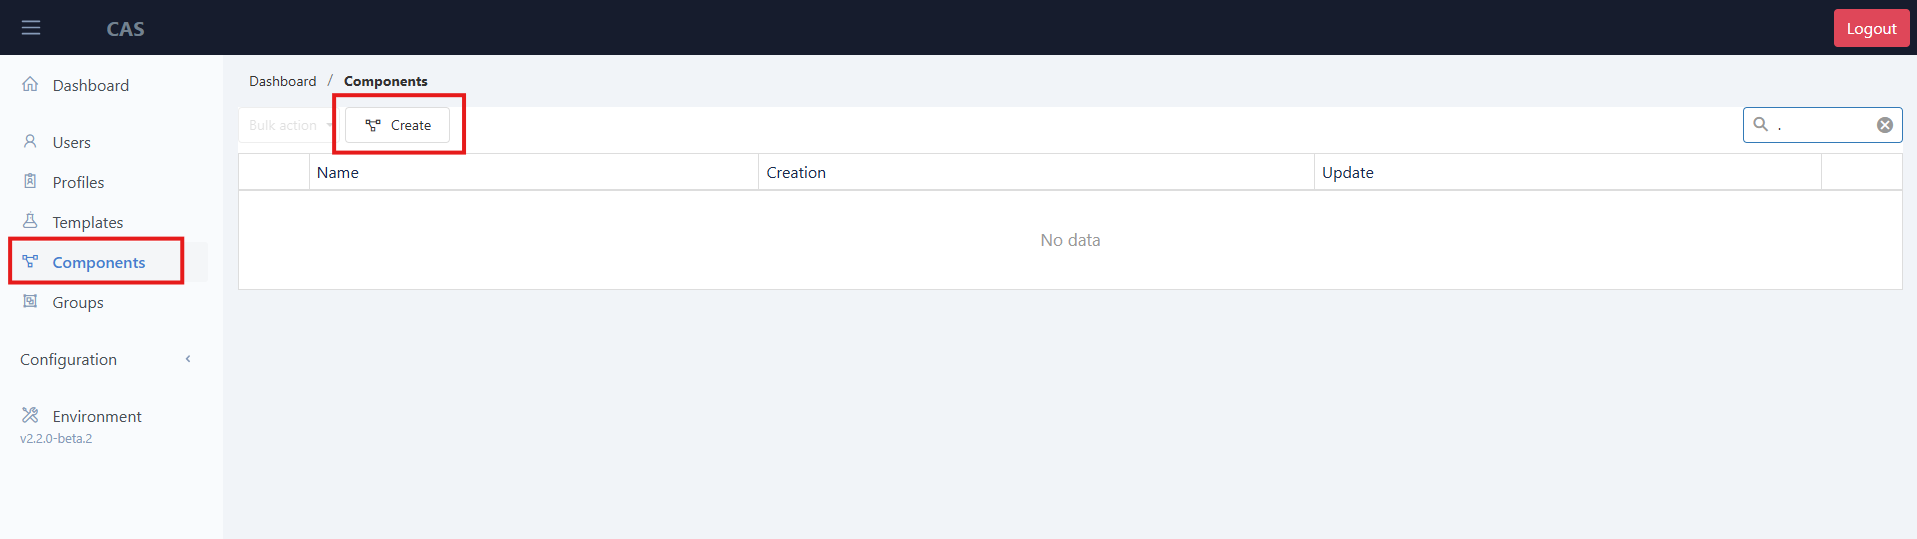
Step 1 - Create an empty CLB
As CLB is a very central component in the artchitecture, let's first create one by going to Components panel and the press +Add button
Then enter in the Name area the name you've given to this CLB when you've deployed the package on your azure tenant

Fill in the required field:
| Parameter | Value |
|---|---|
| FQDN | Must match Customer Domain |
| Matrix Uri | Websocket connection to the Matrix pool ws:// ClbMedia1 IP:8025|ClbMedia1_Pub_IP;ws://ClbMedia2 IP:8025|ClbMedia2_Pub_IP;ws://ClbMedia3 IP:8025|ClbMedia3_Pub_IP |
| Connection Uri - Internal | Websocket connection to the CLB Container App wss:// Clb container FQDN:443 |
| Connection Uri - Public | Websocket connection to the Clb Web Proxy or the App Gateway wss:// CustomerNameclbwebproxy.azurewebsites.net:443 |
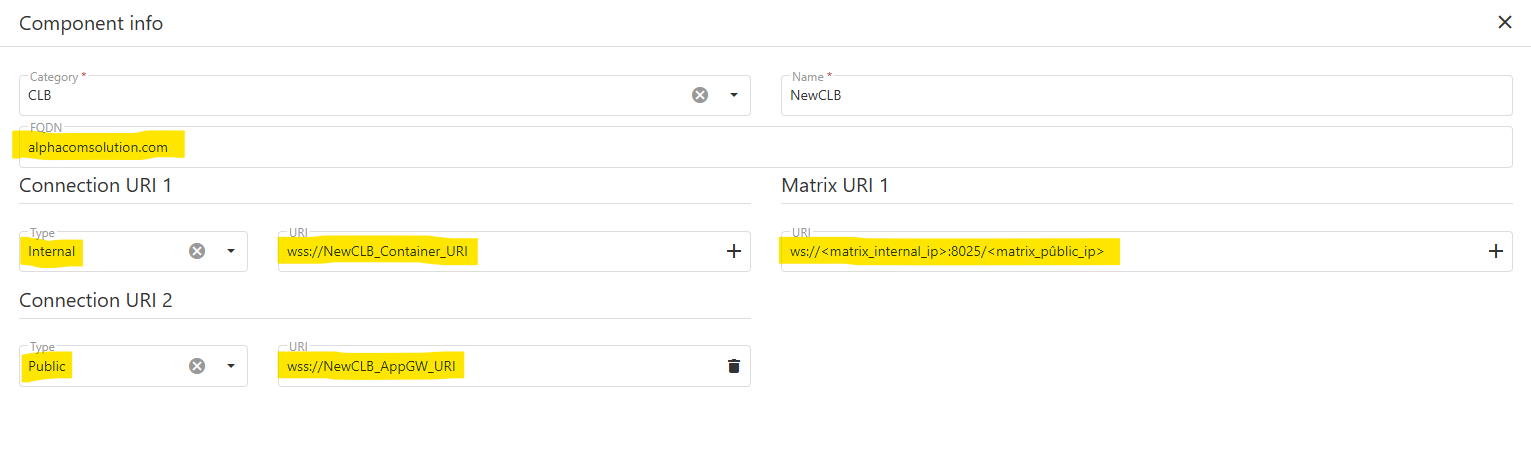
Save the profile and go back to the main list

Important
After each modification of the CLB configuration, it is necessary to perform a CLB Maintenance.
Go to the Components page and hit the 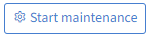 button next to the impacted CLB.
Relead the page and hit the 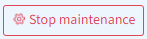 button.
The new configuration is now applied on the CLB.
Step 2 - Create an empty CLB Slots Group
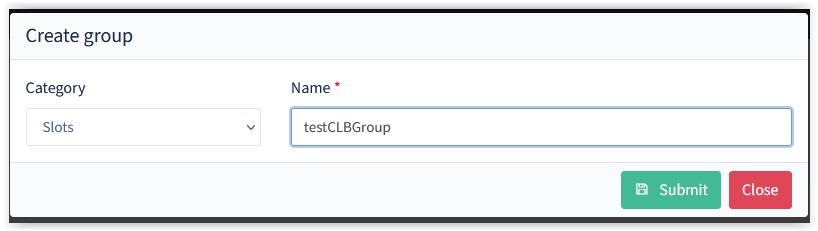
Create a system group that will be used for system administration by clicking the +Add buttong in the Groups CAS section.

Choose "Slots" category and insert an arbitrary name.
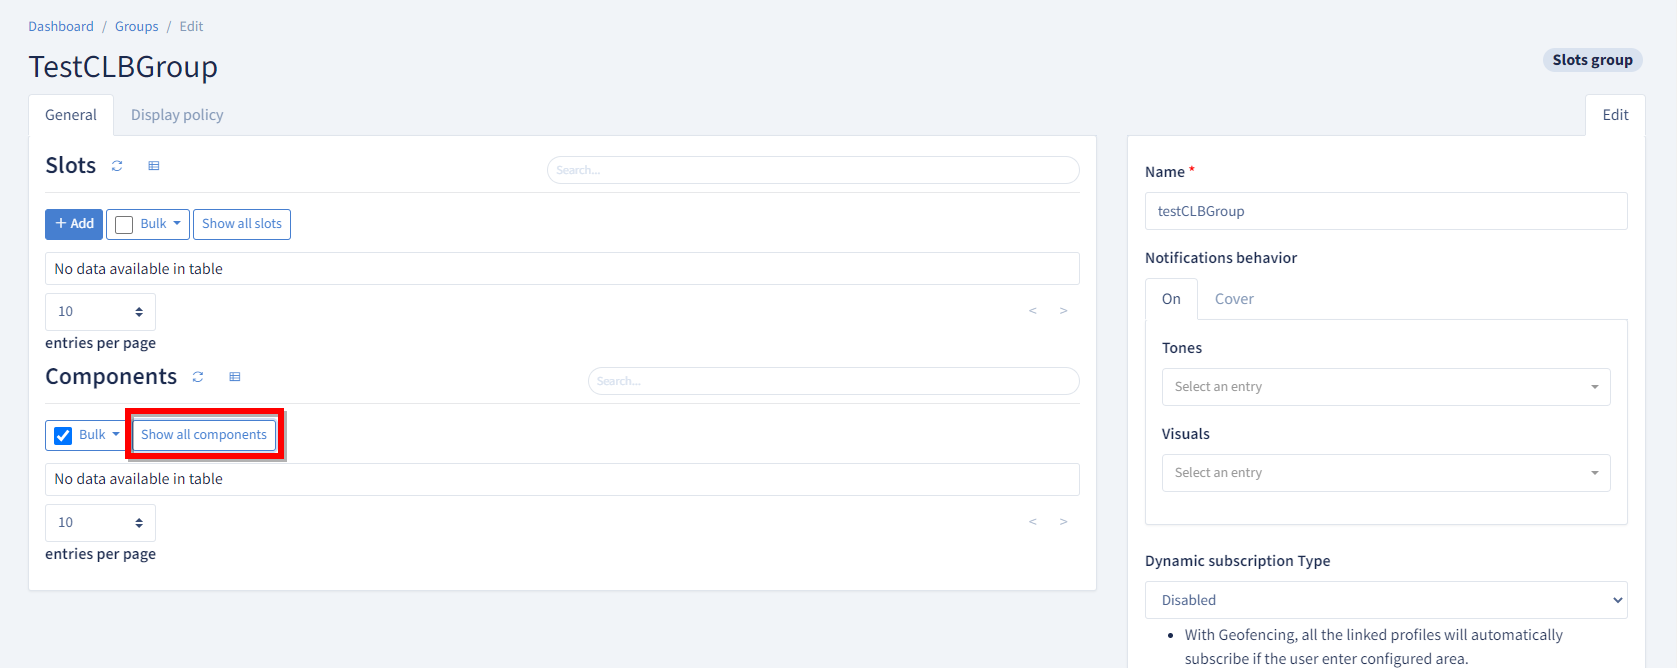
This Group must now be linked to the CLB.
Display the list of available Components using the Show all Components button
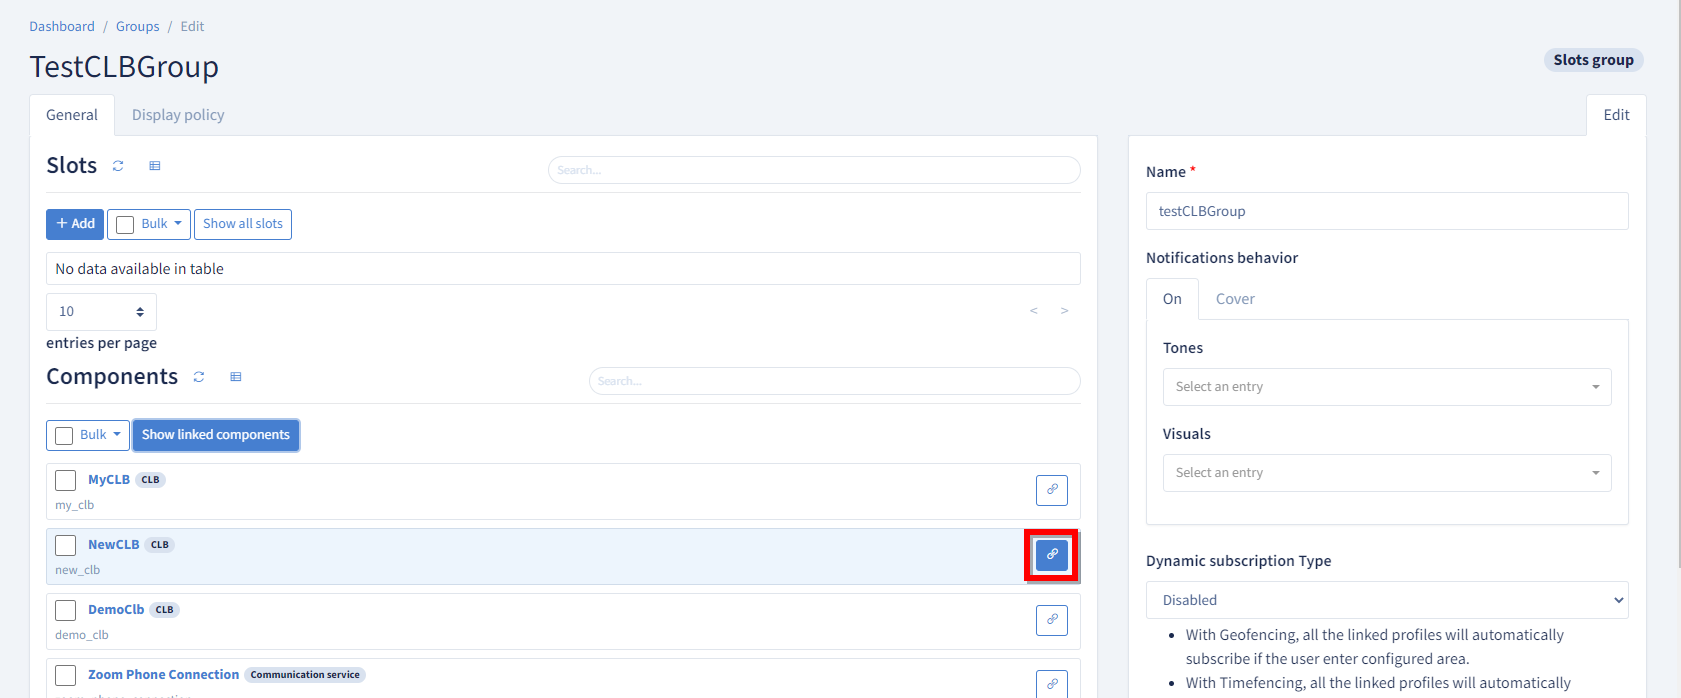
Seek into available components list and click the link button to associate the correct CLB to the Group
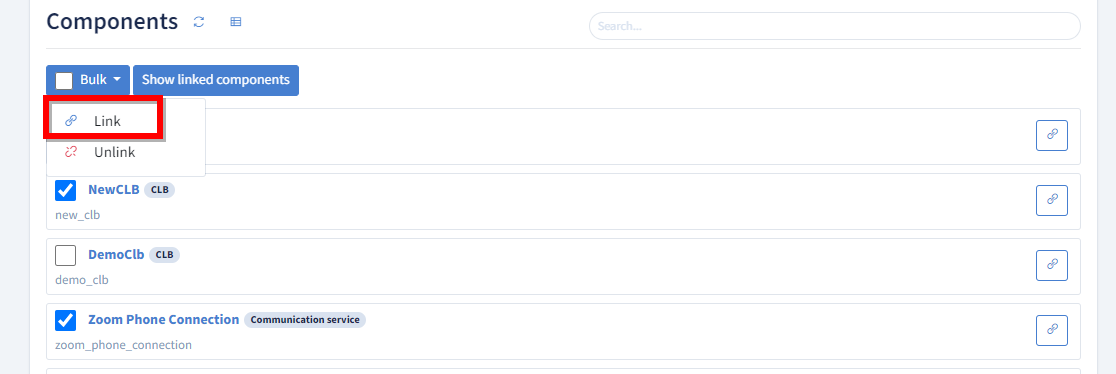
You may also select multiple components at once like a PBX or a private wire gateway if you've defined them and press Bulk/Link in order to associate these components to the group.
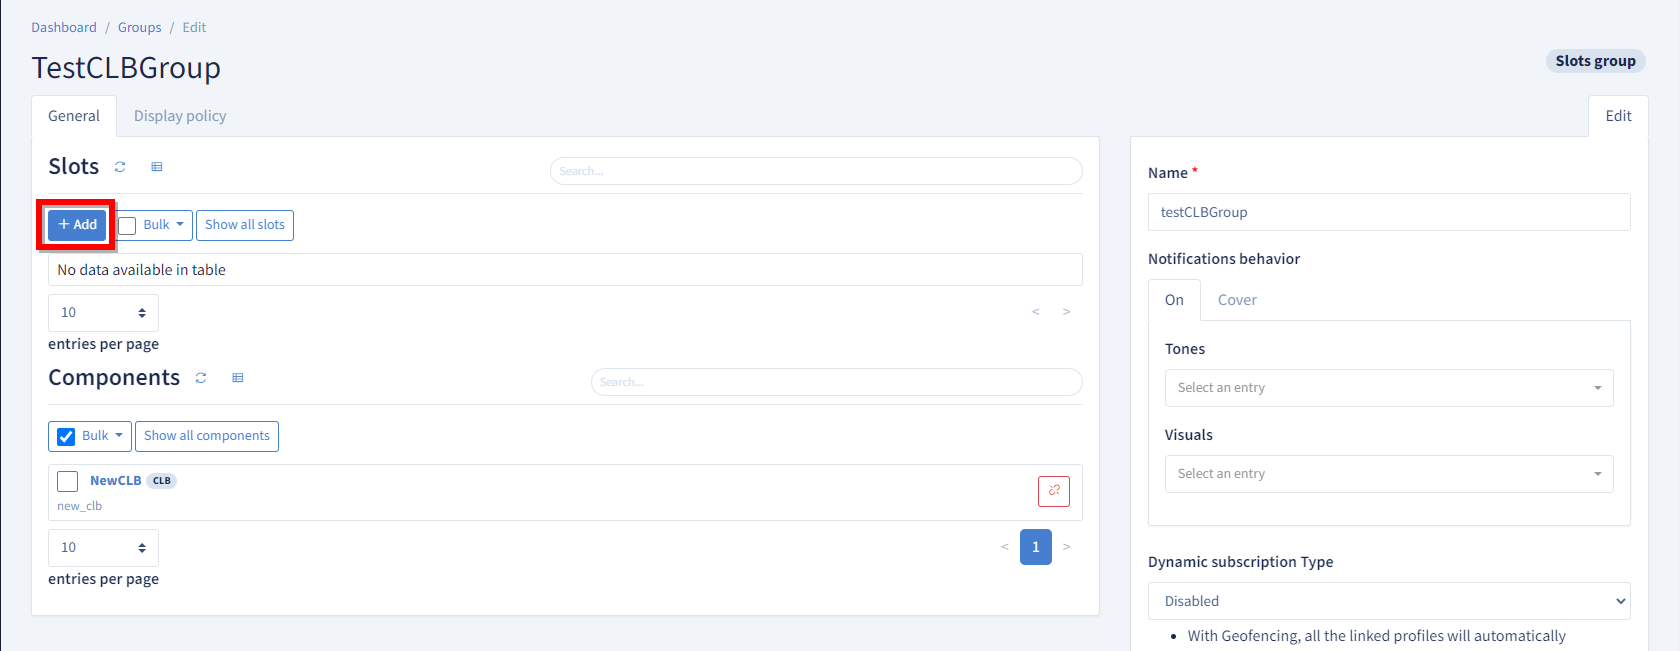
Step 3 - Create slots within a group associated with CLB
We now need to add slots to this group so that CLB knows what to run. Press +Add button in the slots section.

The Intercom and IVB slots are purely internal by default and do not require any Communication Service or DMR Component to function correctly.
On the other hand, the Routed, Persistent and DMR slots must have their Administration group also linked to a Communication Service or DMR Component so that the CLB knows where to send the calls placed on these slots. More details about connecting these components can be found in Connecting Components
Warning
After the Slots have been created, it is necessary to perform a CLB Maintenance
Step 4 (optional) - Create a Slot Group for user profile
Although you can use the same group (created in Step 2) to associate it to a user profile, it is recommended to create a group of slot linking the same slots previously created into a group that will be used within user profiles only. That way user preferences and back end setup can have independent evolution over time.
Note
This optional Slot Group for User Profile must not to be linked to the Components. The Slots will always inherit the Components from the inital Group.
As a general rule, the Slots must only be linked to the Components Once. If the Slots are linked to several Groups, only One of them must have the Components linked.
Step 5 - Create a Settings Group for Global config
In order to simplify a maximum the Nomad installation process, the application will automatically build the CasBackEndAPI Uri based on the Customer Domain (extracted from the User Login).
It can, however, be overwritten in case the DNS redirection is not in place.
More details on that setup can be found in Nomad Configuration
The same applies to the various Services Uri (History, Presence, Slots, Location, etc.) but as these can also be retrieved from the CAS in the User Profile, the DNS redirection for these is optional.
In case the DNS redirection is not in place for the Services, their Uri must be specified using CAS Settings.
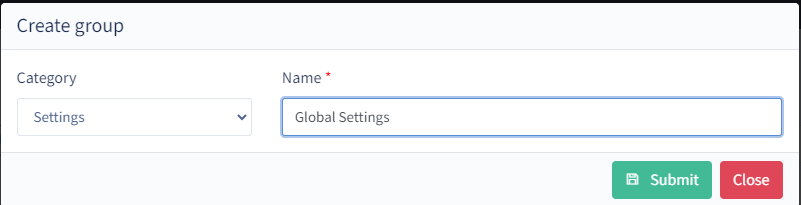
Create a new Group that will be used for Global Settings by clicking the +Add buttong in the Groups CAS section.
Choose "Settings" category and insert an arbitrary name.
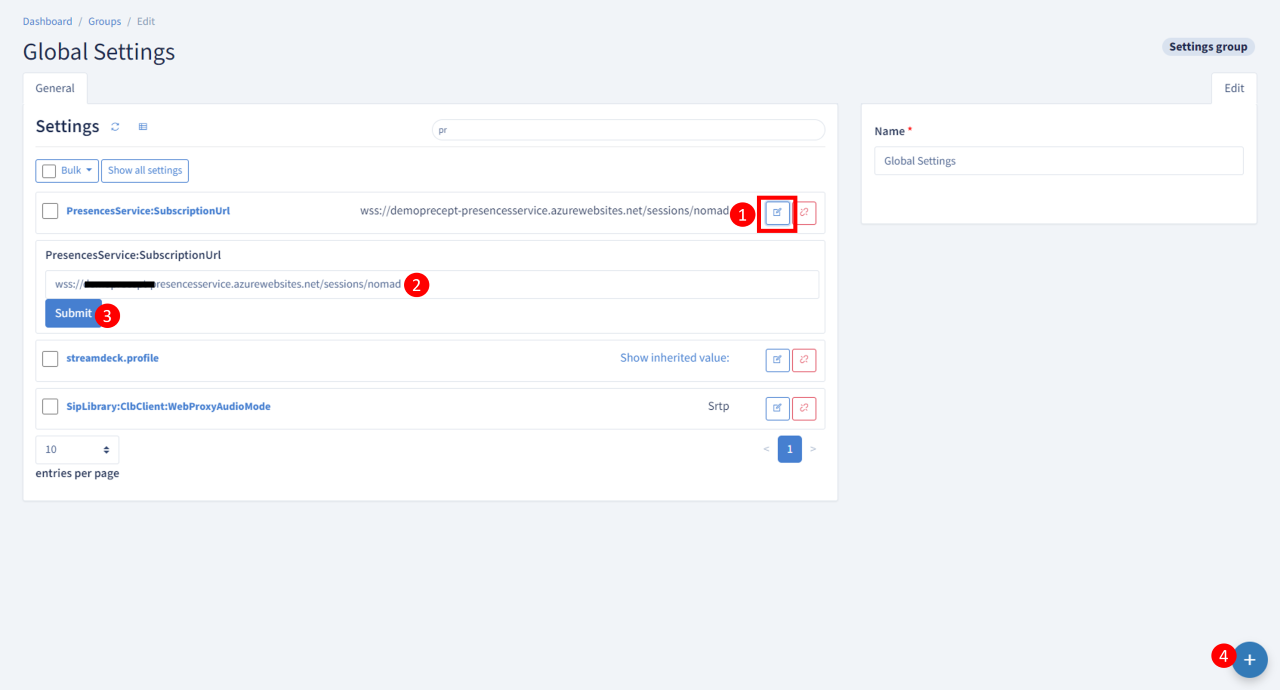
Display the list of available Settings using the Show all Settings button
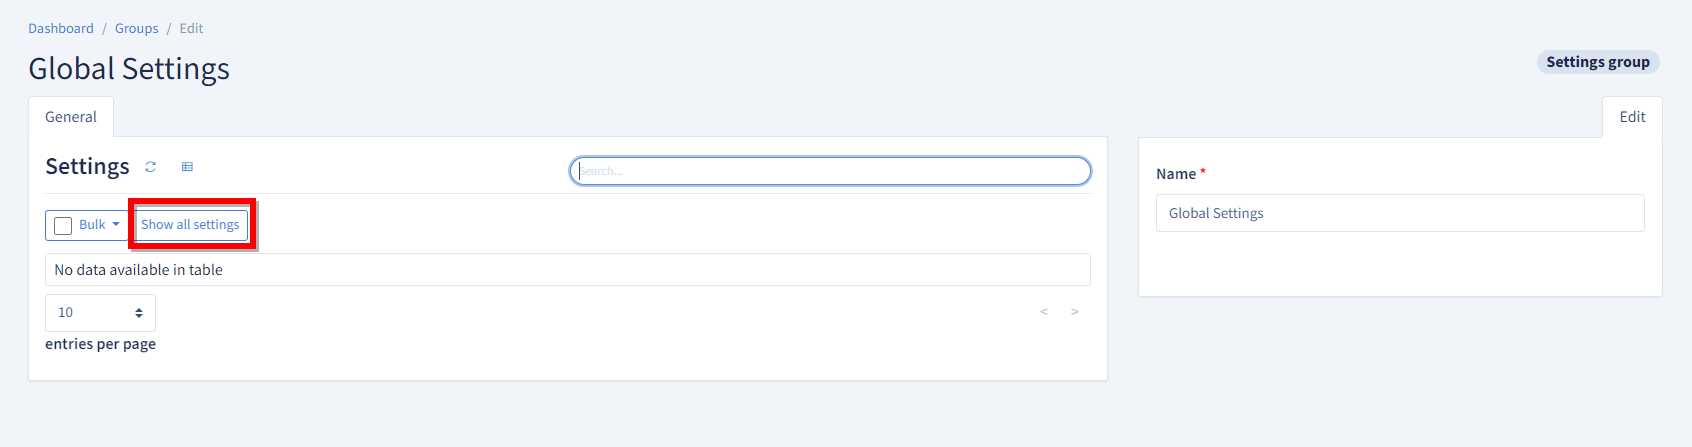
Seek into available Settings list and select the following ones before pressing Bulk/Link in order to associate these settings to the group.
| Setting | Service Value | Default Nomad Value |
|---|---|---|
| SlotsService:UseDirectClbSubscriptions | false | false |
| SipLibrary:ClbClient:WebProxyAudioMode | Srtp | Srtp |
| LocationService:PostBaseUrl | https://CustomerNameprecept-locationingester.azurewebsites.net/api/ |
https://locationapi.user-domain/api/ |
| LocationService:SubscriptionUrl | wss://CustomerNameprecept-locationdispatcher.azurewebsites.net/events/ |
wss://locationevents.user-domain/events/ |
| CallHistoryService:EndpointBaseUrl | https://CustomerNameprecept-callhistory.azurewebsites.net/api/ |
https://callhistoryapi.user-domain/api/ |
| PresencesService:SubscriptionUrl | wss://CustomerNameprecept-presencesservice.azurewebsites.net/sessions/nomad |
wss://presenceevents.user-domain/sessions/nomad |
| SlotsService:SubscriptionUrl | wss://CustomerNameprecept-slotsservice.azurewebsites.net/events |
wss://slotsevents.user-domain/events |
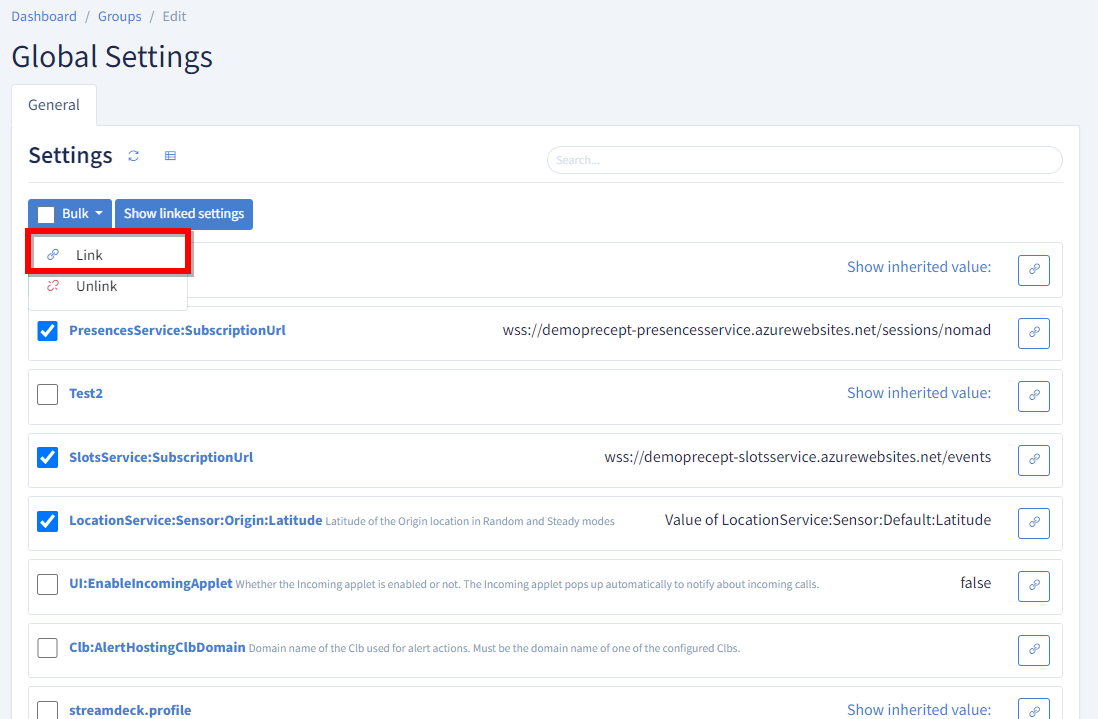
After the settings are linked to the Group, it is possible to edit and update their default value:
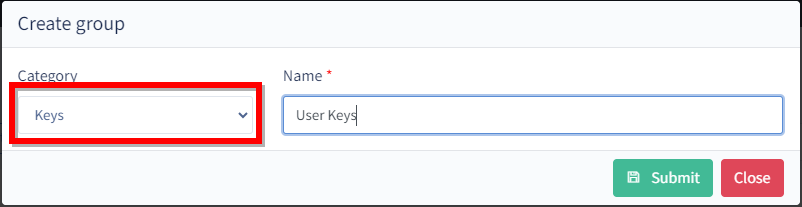
Step 6 - Create a Keys Group
At least one Keys Group should be created to allow the User to have access to his Contact / Shortcuts
Create a new Group that will be used for Keys by clicking the +Add button in the Groups CAS section.
Choose "Keys" category and insert an arbitrary name.
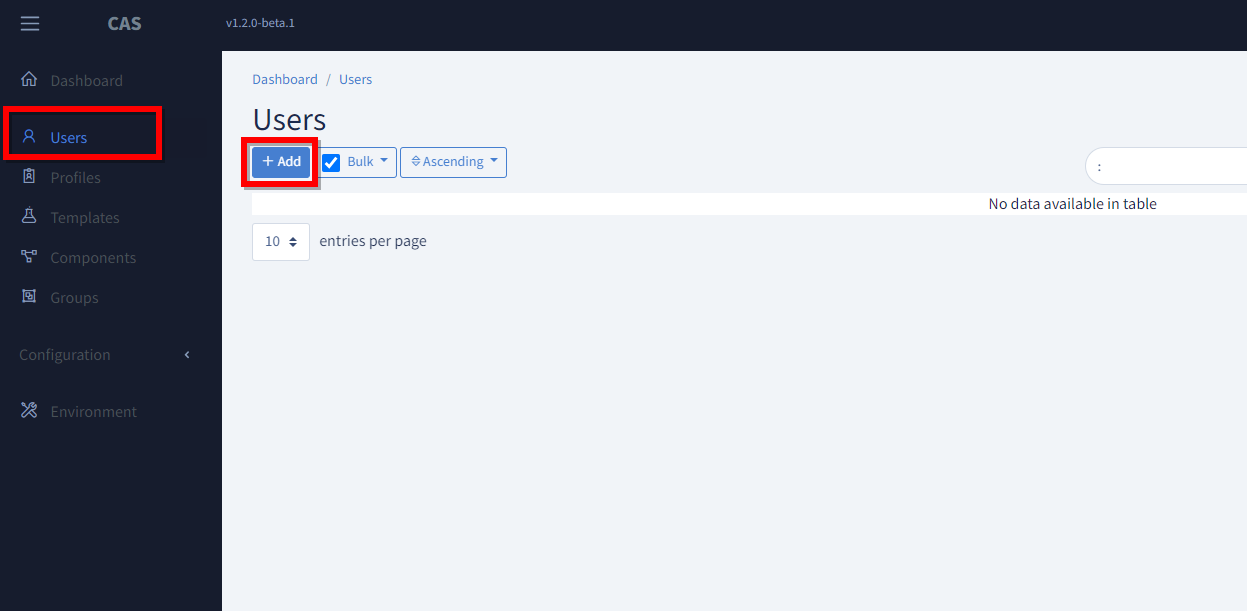
Step 7 - Create a User
To login on the Nomad, the Users will authenticate with their AAD credentials but in order for the System to give them access to their Profile, a User must be created in the CAS.
Create a new User by clicking the Add button in the Users section.
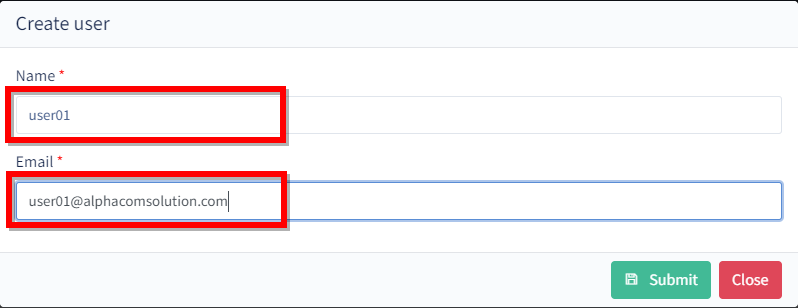
Enter his Name and email, and Submit.
Warning
The User must exist in the AAD of the Customer Tenant as the Authentication itself is handled directly by Microsoft.
Upon creation of a User, the CAS will automatically populate a Key with 3 identities for that User:
- Main (user01@alphacomsolution.com) => Identity used for the Presence
- Talk (user01-TalkLine@alphacomsolution.com) => Identity used for the Talks
- Alert (user01-AlertLine@alphacomsolution.com) => Identity used for the Alerts
Go to the Configuration > Keys section and edit the key of the same name than the newly created user
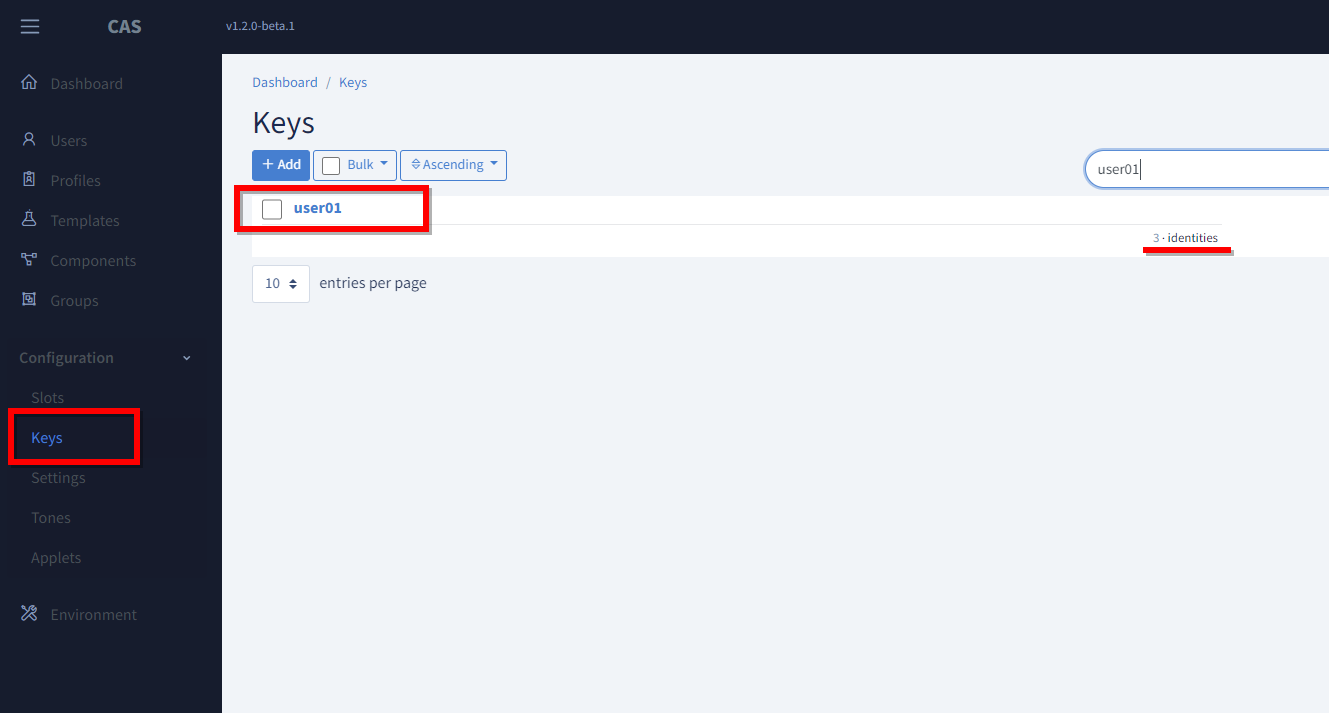
Link that key to the Keys Group created in Step 6

Step 8 - Create a Key
Let's create at least one Contact Key for our User
Go to the Configuration > Keys section and press the Add button
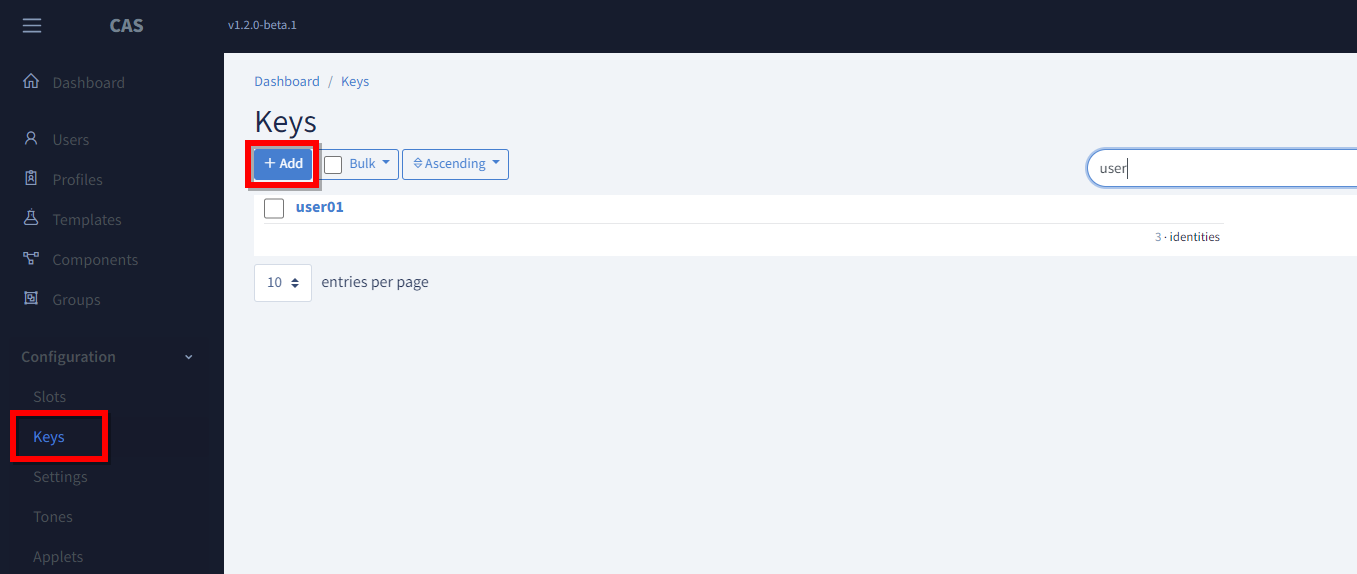
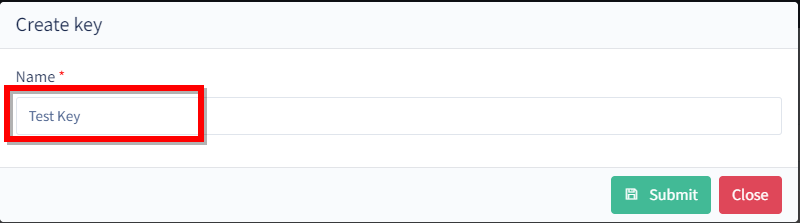
Enter a Name and Submit.
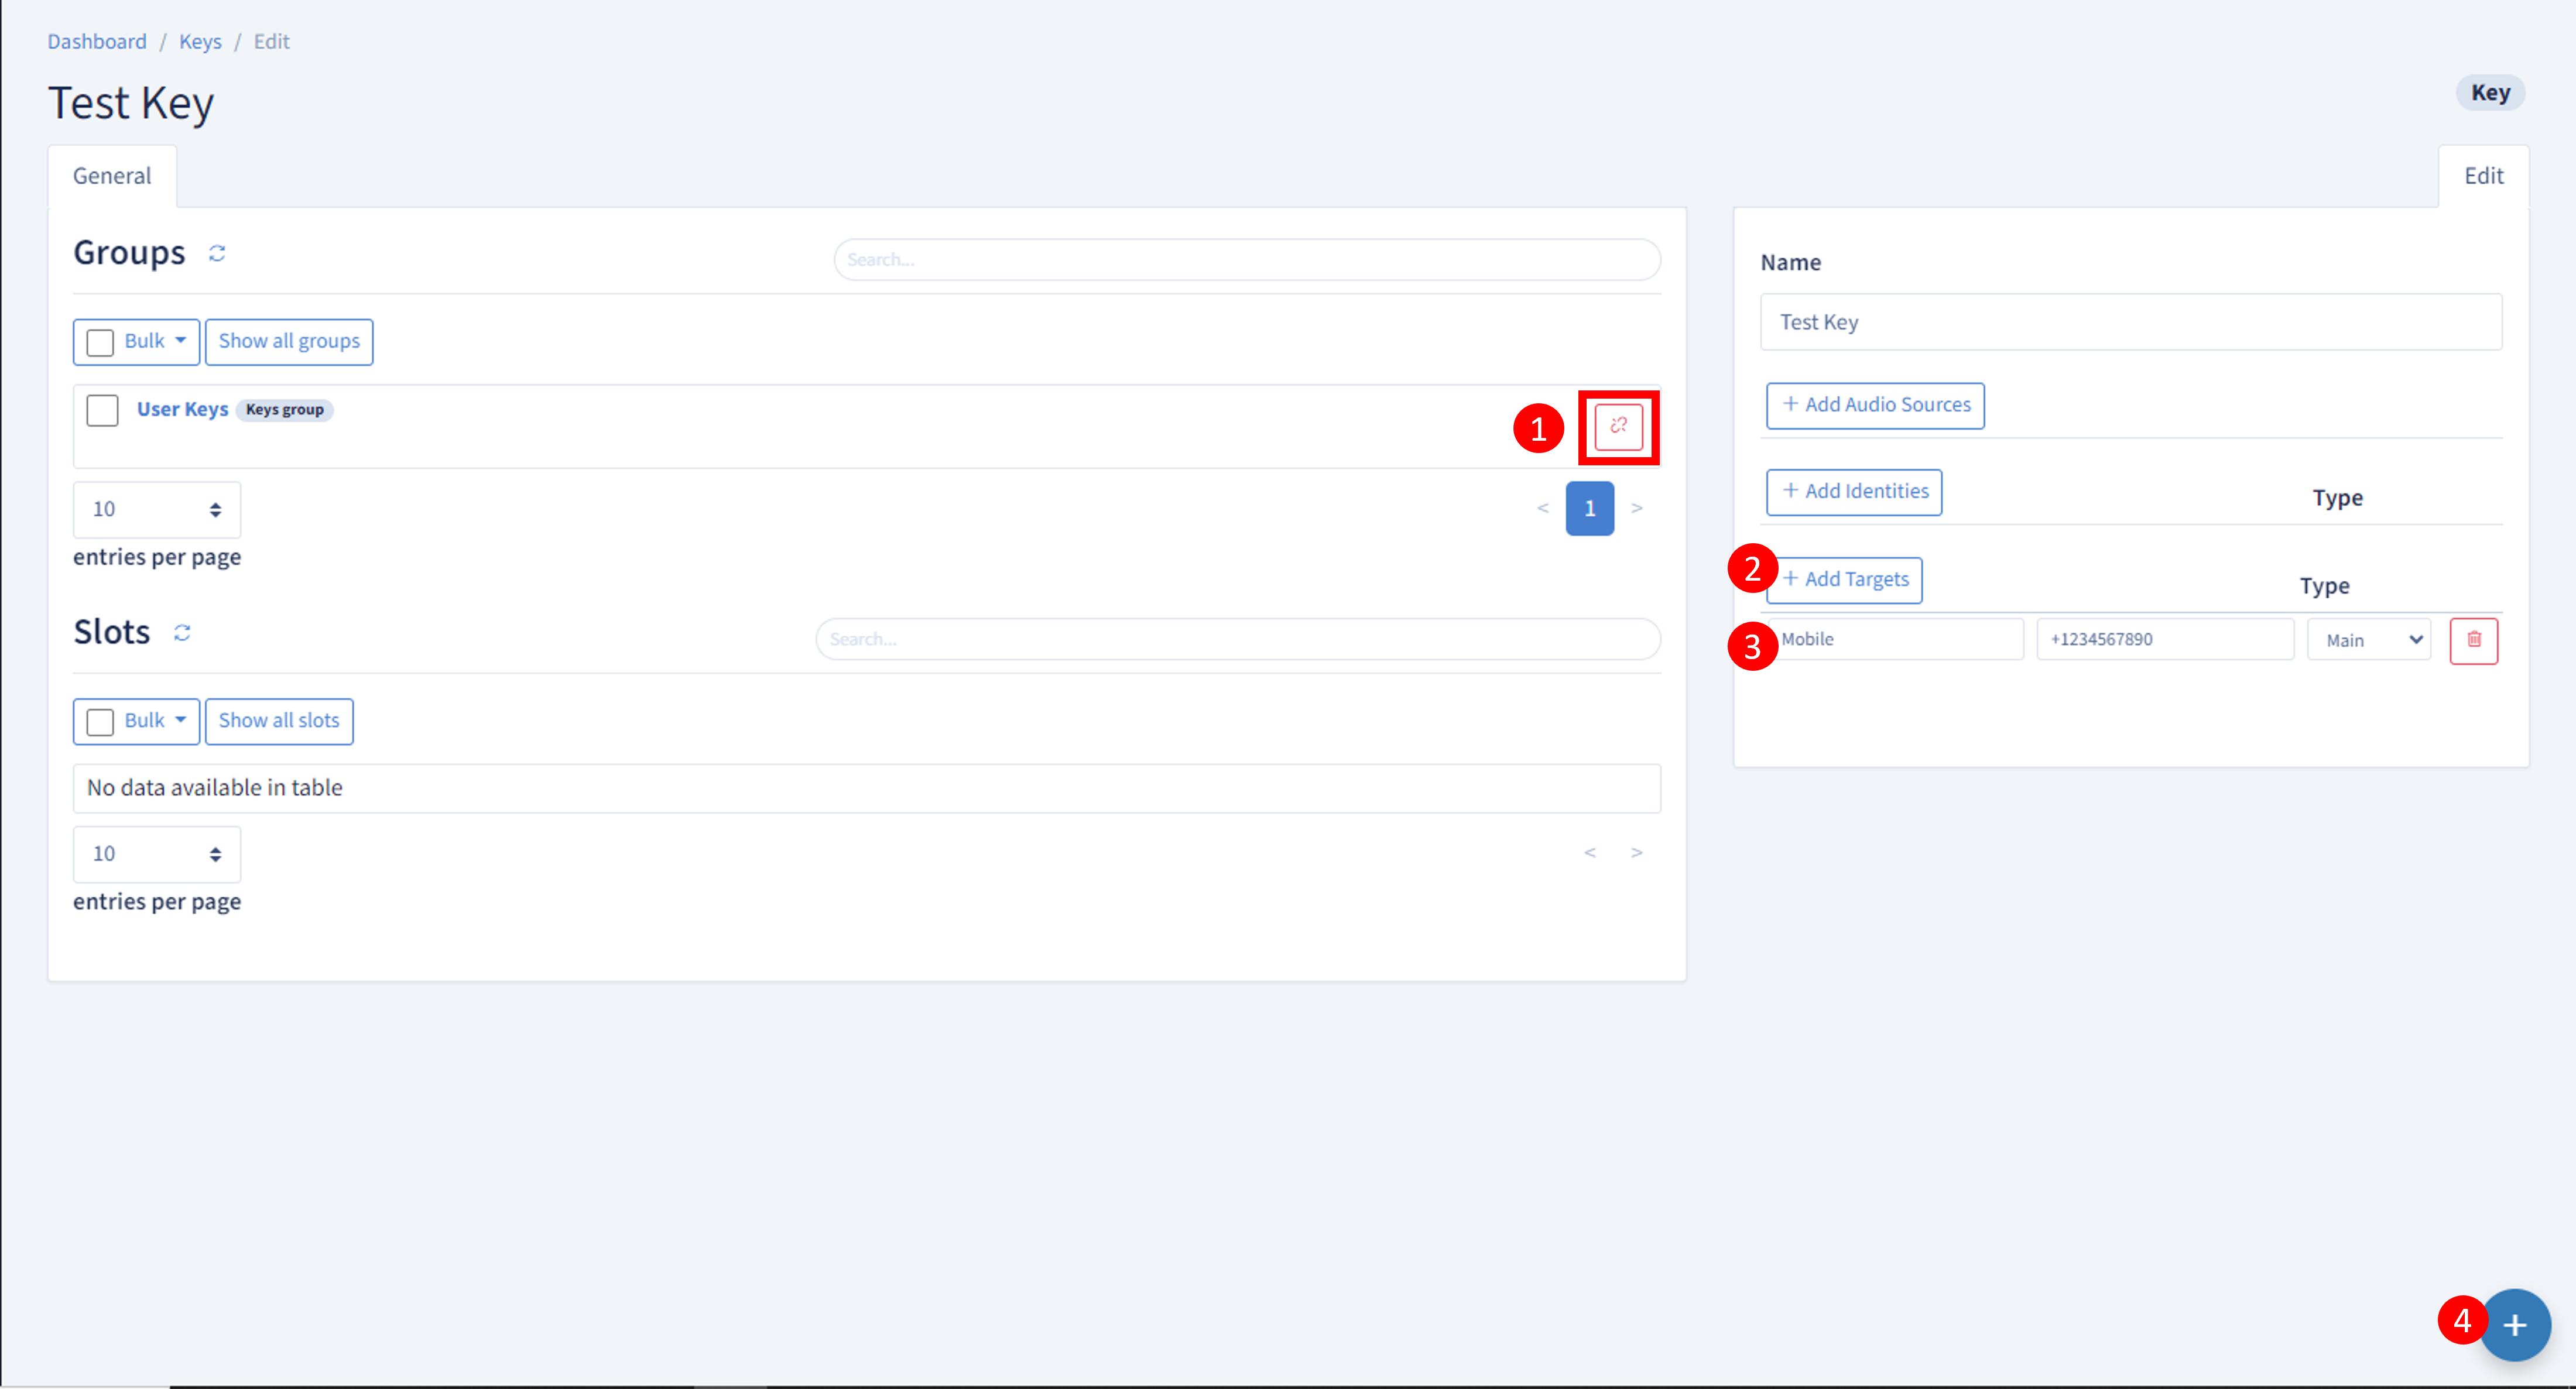
Now the key must be linked to a Key Group (here we'll use the one created in Step 6) and one or several Call Targets should be added.
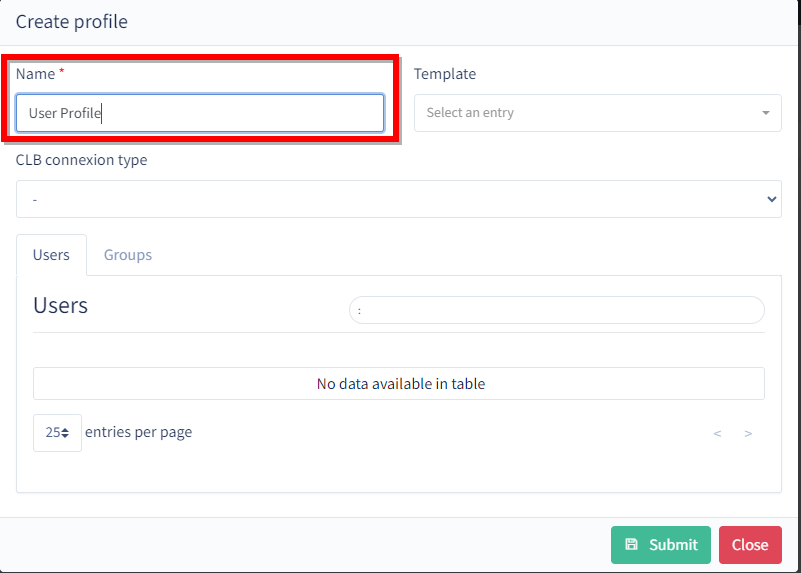
Step 9 - Create a Profile
Now that we have the Components, the Slots, the Settings and the Keys we can create a Profile for the User.
Go to the Profiles panel and press the +Add button

Set a name for the Profile and Submit
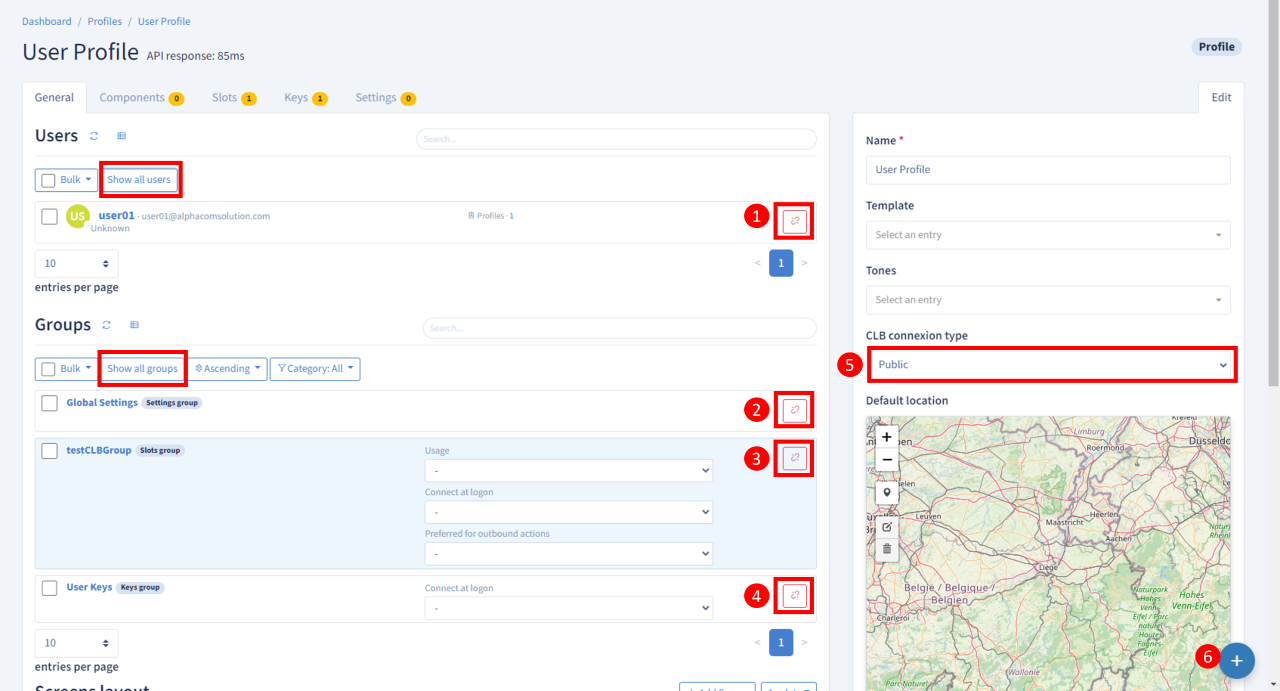
We know need to link all the elements we created above to this Profile:
- The User
- The Settings Group
- The Slots Group
- The Keys Group
- The Clb Connection type
Step 10 - Login the User
User01 is now ready to login on Nomad